Showing posts with label recipes. Show all posts

My first daring attempt to tackle Mum's Indian Curry Chicken! (I can't tolerate spice very well) And may I say... I LOVED IT!


Mum used only the wing and thigh parts, and the tomatoes added a sweet-sour twist to the palate. It turned out, the only gripe everyone had (but me) was... it wasn't spicy enough! :P

Mum's Indian Curry Chicken Recipe

To be prepared before cooking
Ingredients
Dry Chilli (Mum suggests the ones from China)
A little Cooking Oil
Coriander Seeds

Method
1. Clean the chilli with a slightly damp cloth; do not wet.
2. Cut into half. Seeds need not be removed.
3. Fry the chilli in a little oil, DO NOT BURN!

4. Wash coriander seeds, then let dry.
5. Fry the seeds without oil. (roasting)
6. Grind Chilli and Coriander Seeds separately. Set aside to be used later.

Seasoning for Chicken
Ingredients
3 Tbsp Ground Chilli Powder (made as above)
1 and 1/2 Tbsp Ground Coriander Powder (made as above)
1 slice of ginger, diced
1 tsp Mustard Seeds
1/2 tsp Turmeric Powder
Salt to taste
1 chicken, chopped into bite-size pieces
10 shallots

Method
1. Cut 10 shallots longitudinal-wise; slightly thick. (Knife perpendicular to two ends)
2. Mix the Chicken pieces with the Ground Chilli Powder, Ground Coriander Powder, Diced Ginger, Mustard Seeds, Turmeric Powder, 10 Shallots and Salt.
3. Leave in the fridge overnight.

Cooking
Ingredients
Marinated Chicken Pieces (as prepared above)
5 shallots
Cooking Oil
1 to 2 Tomatoes
2 stalks of whole Green Chilli
5 stalks of Curry Leaves

Method
1. Cut 5 shallots transverse-section into thin slices. (Knife parallel to two ends)
2. Heat the oil in a wok, then add the 5 shallots and fry until fragrant and slightly brown.
3. Add marinated chicken pieces and fry on medium fire.
4. When chicken is about 1/2 cooked, add Tomatoes, Green Chillies, Curry Leaves and 1/2 cup water.
5. If the chicken appears too dry, add 1/2 cup water each time. (Do not add too much)
7. When chicken is cooked, remove from heat and serve.

*Please adjust the ingredients according to taste and level of spiciness! ;)

[get this widget]
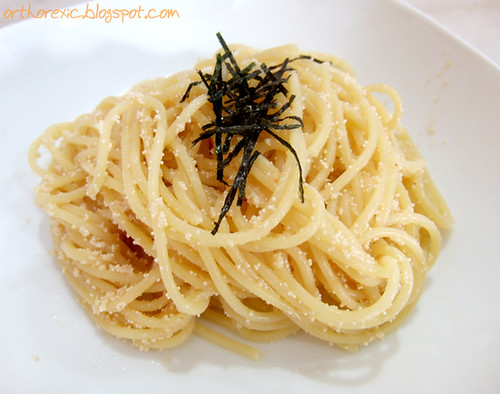
I recently got introduced to Japanese-influenced Italian dishes, such as Tofu Mentai and Mentaiko Spaghetti, so I decided to try my own! Here's how I made my Mentaiko Spaghetti!


Here's the Mentaiko before opening the sac! I used one sac for a serving of two.


Using Chubby Hubby's recipe as a basic guide, it turned out pretty good even though I substituted butter with chicken fat and left out the wine.

XY's Mentaiko Spaghetti Recipe
Serves 2

Ingredients
1 Sac Fresh Mentaiko
3 Tbsp Chicken Fat (less sat. fat than butter)
5 Tbsp Chicken Bones Stock (according to taste for smoothness of sauce)
1/2 Medium Onion
1/2 Tbsp Light Cream
2 Tsp Japanese Mayonnaise
Roasted Nori strips (for garnish)

2 servings of Spaghetti
Cooking Oil
Pinch of Salt

Method
1. First, cook the pasta. Boil a pot of water and add a little oil and salt. When it boils vigorously, add the uncooked pasta.

2. Let the pasta cook until al-dente. You can pick up a strand to test whether it is ready. Make a note of the timing so you can refer to it again next time.

3. When the pasta is ready, simply drain the water and let it rest for a while.

For the Sauce:
1. Carefully cut open Mentaiko sac and scoop out the Mentaiko with a metal spoon into a small bowl.

2. Blend the Onion slightly to get a thick paste.

3. Heat a pot on medium fire and add Chicken Fat. When it has heated up, add a little less than all of the onion paste you made and stir fry until fragrant.

4. Raise the fire to medium-high. Now add the stock and stir a while longer until it starts to be reduced.

5. Turn heat off and add Cream, Mentaiko and Mayonnaise. Stir well so everything is mixed.

6. To serve, simply heat up a pan and add the pasta and sauce. Stir and mix well then put it on a plate. Garnish with some Roasted Nori strips and serve it while it's hot!

Enjoy! :)

[get this widget]
One of our usual home food: Chicken in Red Yeast Gravy (红糟)! My favourite part is the knuckle (pictured in the centre!) Another great accompaniment to rice!

Photobucket


Recipe from Mum:

Ingredients:
Sesame Oil
Cooking Oil
Light Soy Sauce
Ginger Juice
8-10 cloves Garlic
2 - 3 Tbsp Fermented Red Yeast Paste
Red Wine/Cooking Sherry
Salt to Taste

Method:

1. Season chicken meat with sesame oil, a dash of light soy sauce and ginger juice. Keep in the fridge for a few hours.

2. Add 1 part cooking oil and 1 part sesame oil to wok, crush 8 to 10 whole cloves of garlic (lightly smash, do not chop).

3. Fry Red Yeast Paste over slow fire until fragrant (around 3 minutes).

4. Add chicken and stir-fry.

5. Add Red Wine/Cooking Sherry and a little water if it gets too sticky.

6. Simmer over slow fire until chicken is cooked.

7. Add salt to taste.

Note: It's a good idea to taste the Red Yeast Paste before adding salt because some brands of paste can be extremely salty. We bought ours here from:

Foo Chow Fishball Noodles
33/35 Sultan Gate
Kampong Glam Conservation Area


p.s. I love their Foo Chow Fishballs and Wanton (燕皮) too!

[get this widget]
Delicious potato curry with a twist!! Instead of the usual chicken, Mum used pork meat and it turned out amazing!


She did not use long pork ribs because they are rather lean and tend to be a little tougher (siap). Instead, she asked the butcher who recommended the slab of meat above the ribs. What also made this a success was that Mum used fresh coconut juice which she extracted herself! Lots of hard work indeed! :D


Ingredients
500g Pork Meat (choose portion at tip of ribs along spine)
Boiled Potatoes
Dry Chillies
5 Buah Keluaks
1/2 Bowl Shallots
1 medium size Onion
3 stalks Lemongrass
2-3 pieces Lengkuas
2 Tbsp Curry Powder
Milk from 1/2 Coconut (separate first squeeze in small bowl and second squeeze in big bowl)
1 Cube Chicken Stock
Salt to Taste
1 stalk Pandan leaf (Optional)

Method
1. Grind Dry Chillies, Buah Keluak, Lengkua, Lemongrass, Shallots and Onion.

2. Fry until fragrant and add curry powder.

3. Add Pork Meat and stir-fry for a short while.

4. Add Coconut Milk. (big bowl: 2nd squeeze)

5. Add potatoes, chicken stock and bring to boil for about less than 30 minutes. Be careful not to overcook pork meat as they might turn dry (siap).

6. Finally, add the first squeeze coconut milk to your own liking. We added just a little bit.


The curry is not too spicy or oily, yet fragrant and bursting with curry-goodness! You can eat this with rice, crispy toast.. or on its own! Even a non-curry lover like me fell in love with this dish immediately!

[get this widget]


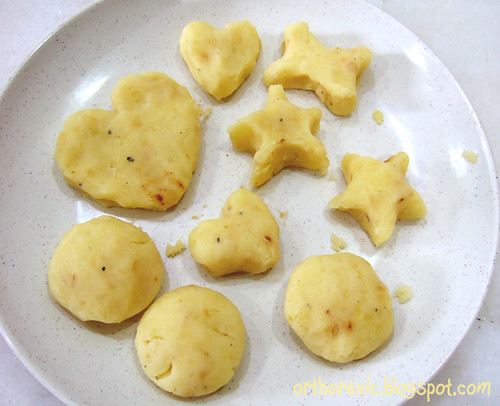
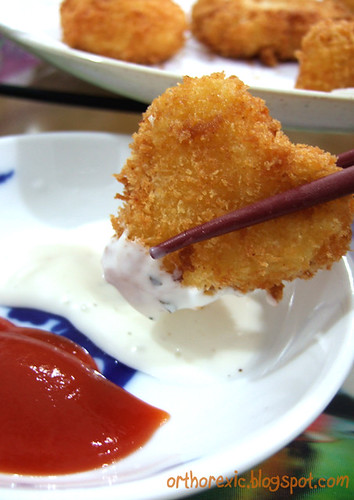
I simply love potatoes, and I love them baked, roasted, boiled, mashed and deep-fried!! Here's a recipe for Japanese Croquette (called "Korokke" コロッケ) which can be found here. You can add minced meat, corned beef and frozen vegetables too! They taste great with extra onions, a bit of garlic... and the best part is, it tastes good even with just little salt!

Ingredients
Potatoes, boiled til soft
1 Egg
Onion (1 medium)
Garlic Powder
Flour
Oil, for deep frying
Panko パン粉 (Japanese Breadcrumbs)
Herbs, Salt and Pepper to taste

Method:

1. Mash potatoes until fluffy. (Do not use a machine or it will become too smooth!)

2. Mince onions or slightly blend chopped onions in a blender.

3. Pan fry onions until they turn brown. (but not bitter!)

4. Mix the onions with the potatoes, and add the seasoning.


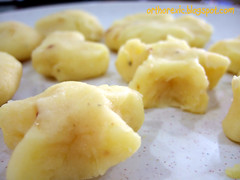
5. Mould the potatoes into flat, smooth shapes of around 8 cm thickness. The traditional Japanese Korokke is a round, oval shape.

6. Coat the potato pieces with flour.

7. Dip each piece in beaten egg, then coat evenly with Panko (Breadcrumbs).


8. Deep-fry in hot oil until golden-brown and crispy.


Mmm... try it with a dip if it's not tasty enough. Creamy dips go very well with Korokke!! (:


[get this widget]
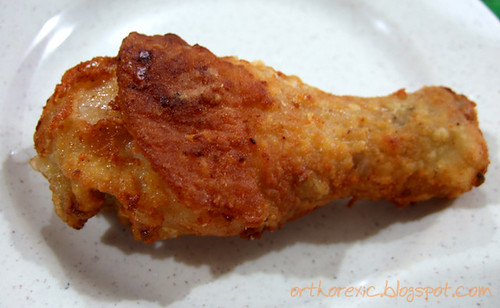
When Mum roasts chicken in a turbo, she adds a drop of orange food colouring to make them look irresistably delicious. This was what my Ah Gong (grandfather) used to add to his roast chicken. Can you believe I once downed 8 salt-free chicken drumsticks in one go? Presentation does make a difference!! ;)


Seasoning:
Fresh Garlic, Mashed
Mexican Chilli Powder
Ichimi Togarashi
Pepper
Salt and Sugar to taste

Lime Juice (Serve together)


These Chicken Drumsticks were absolutely delicious! Goes well with a little lime juice to excite the tastebuds! We had this together with Mum's super-SHIOK Tom Yam Soup!

[get this widget]


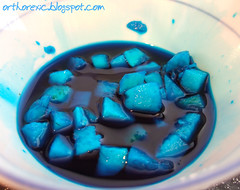
This image has only been resized; otherwise there is no other editing done to the photo.

Ingredients
Water Chestnuts, skin removed
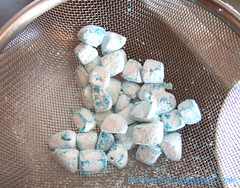
Tapioca Flour (about 2 heaped Tbsp for 2 Water Chestnuts)
Drop of Food Colouring
Ice Water

For Thai Red Ruby Dessert:
Sugar Syrup (Dissolve sugar in boiling water)
Coconut Milk
Shaved Ice


Method:
1. Chop Water Chestnuts to about 1cm3 cubes.

2. Add a drop of food colouring and mix with hands. Add a bit of water (just a bit!!) and leave it for 5 minutes.

3. Put the Tapioca Flour in a plastic bag. Dry the Water Chestnuts before adding them in, and shake the bag to coat the Water Chestnuts. Make sure they are fully coated with the Tapioca Flour.

4. Use a sieve to rid any excess flour. Don't do this too vigorously, or too much will fall off, exposing the Water Chestnut.


5. Cook the Water Chestnuts in boiling water for about 3 minutes. Meanwhile, I use chopsticks to separate rubies that start sticking to each other.

6. Gather the rubies in a sieve and quickly dump in Ice Water.

7. Drain the rubies and soak them in Sugar Syrup for sweet taste.

8. For the Thai Tub-tim Krob dessert, drain Rubies from Sugar Syrup and serve with Coconut Milk, Shaved Ice and a little extra Sugar Syrup.

P.S. Here's a tip from Thai Table: Spray the Water Chestnuts with water after taking them out from the bag and coat them with flour again for bigger rubies! Also, you can have natural food colouring such as beet juice from boiled beets.

[get this widget]
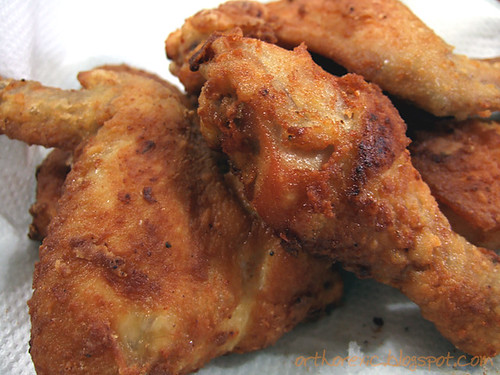
And now I post the unhealthier sequel to the Steamed Chicken, the Crispy Fried Chicken Experiment!


I actually dredged it too early before dinner and had no choice but to leave it til time was up. I actually wanted to bake it, but the thought of using the oven made me decide to just throw it to my Mum to fry. Thanks, Mum! :)

...So you could say this was a 50-50 success... :p


Ingredients:
500 grams Chicken (Drums, Wings etc.)
1 Egg

Flour Mixture
Plain Flour:Rice Flour
5:1

Seasoning
Mexican Chilli Powder
Garlic Powder
Onion Powder
Ichimi Togarashi Chilli Pepper
Brown Sugar
1/2 teaspoon Salt
Black Pepper


What I did:

1. Mix seasoning inside flour mixture, ratio 1:6.

2. Crack the egg and beat it until well mixed. Coat chicken with egg all over.

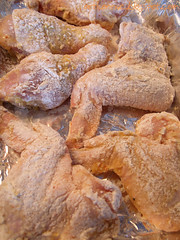
3. Dredge the chicken in the flour mixture, "massaging" the flour and seasoning in.

4. (I baked it slightly before this.) Deep-fry until golden-brown and cooked inside.


Well turned out pretty ok, I guess, for a first-timer... It needs a little more salt and still lacks that kick from the seasoning.. :/


[get this widget]


A little experiment I've always wanted to make, but as you can see from the picture above, it didn't turn out very well. There wasn't enough cheese to cover the entire lasagna pasta, and it dried out when baked. Also kinda over-greased the baking tray... In the end my lovely aunt had the privilege of sharing this with me! :D *smiles innocently*

Ingredients:
-Tomato Sauce-
1 bottle of Chunky Tomato Puree
1/2 can Tomato Paste
1/2 large Onion
1 clove Garlic
1 tsp mixed Italian Spices/Herbs
3 tbsp Olive Oil
1/2 tbsp "Less Salt" Chicken Stock
Pinch of Nutmeg
1/2 Bayleaf
100g Minced Beef
Salt to taste

Cook the tomato sauce as with Spaghetti Al Pomodoro recipe. Add the minced beef just after frying the onion/garlic blend and cook for about 2 minutes (or until slightly brown).

1. Lightly grease the baking tray and layer with tomato sauce. Preheat oven at about 180 degrees C.

2. Put a piece of lasagna pasta on, followed by a generous layer of Shredded Mozzalrella Cheese. (Cover the entire pasta!!)

3. Repeat this, adding layer by layer on the lasagna, ending with the cheese layer.

4. Sprinkle some Grated Parmesan Cheese on top if you like.

5. Bake in oven for about 15 minutes, or until cooked. (Check with a fork) Let it rest for 2 minutes before serving.


This must be the worst "sinful" eat for its high sodium, phosphate and calcium content! If you're on the diet, go easy on the salt and cheese (Try low-sodium ones), and avoid taking more than 1/2 of the serving pictured above. Share it with your loved ones! (like I did, hehe..) If you're making this for others, go heavy on the cheese because it helps retain moisture and keep the pasta soft.

[get this widget]


Adapted from Women's Weekly foodbook: Issue 1

Ingredients:
3 medium-large potatoes
1 heaped tbsp butter
1 1/2 clove garlic, minced
Salt to taste
Dash of Parsley
1/3 cup Hot Milk (Optional)


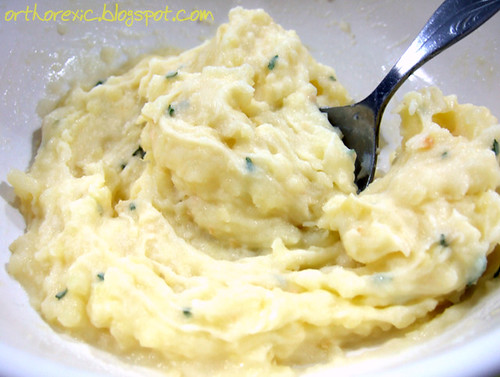
1. Boil potatoes in hot, boiling water for around 20 to 25 minutes. For a quick way to peel the skin off potatoes, see this post. ;)

2. Mince the garlic and heat a pan to medium heat. Melt the butter and fry the garlic for not more than 3 minutes. Do not overcook the garlic or it will turn bitter! X(


3. Mash the boiled potatoes slightly and add the fried garlic oil.

4. Keep mashing the potatoes and mixing it with the garlic oil and fried bits. Add extra butter to make it more smooth/soft.

5. Add a dash of parsley, and salt to taste.


6. (Optional) You can add hot milk to make it even fluffier. Slowly pour in the hot milk, stirring and mixing the mixture to desired smoothness.

[get this widget]
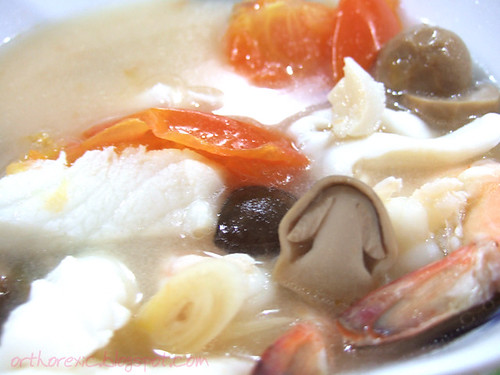
Thai Clear Hot and Sour Seafood Soup


A favourite Thai recipe from Food and Travel magazine which my Mum edited slightly. Change the ingredients to suit your preference. This is the clear version, and does not require any paste. I love the spicy and sour kick!

Ingredients:
1 stalk Lemongrass
1 thumb-length Galangal
2 Kaffir Lime Leaves
3-5 pcs Chilli Padi (to preference)
Juice of 1 large Green Lime
2 tbsp Fish Sauce
About 600-700ml Water
Straw Mushrooms
Prawns, Fish Slices, Squid

Method:
1. Put chilli padi in a small permeable bag and put into a pot.
2. Place soup ingredients in and boil until fragrant and seafood is cooked. Remove the bag of chilli padi when spicy enough.

[get this widget]
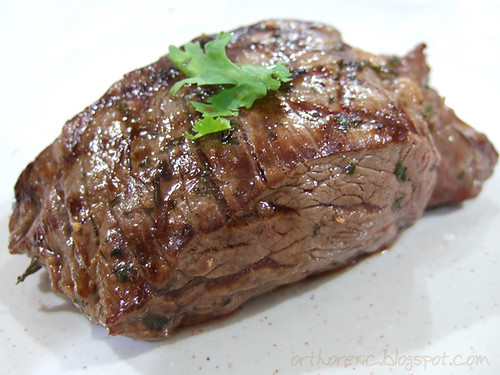
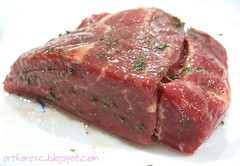
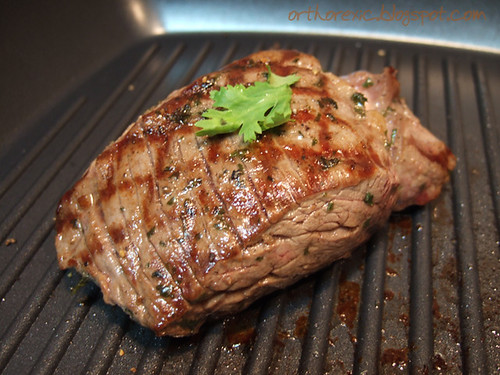
I was lazy to take the MRT down to Novena, so I settled for an Australian Beef Tenderloin ($8/170g) from NTUC. Tenderloins are tender (as the name suggests), but also relatively lean and less flavourful. The cuts are also usually small but thick, so it's harder for the heat to cook the insides of the meat. As much as I like my steaks medium-rare, I don't want to get salmonellosis.


I used a light herb baste with a hint of red wine. Spread the baste evenly over the meat just before grilling.


Herb and Red Wine Baste
2 tbsp Olive Oil
2 tsp Thyme
2 tsp Garlic Powder
2/3 tbsp crushed Parsley
1/2 tbsp Cooking Red Wine

Grilling: Ground Black Pepper and Salt

1. Heat up the grill pan on high heat. Meanwhile, baste the meat evenly.

2. Put the meat on the grill pan and leave it untouched for 5 to 7 minutes. (for 3 to 4 cm thickness) Do not press the steak or the juices will escape.

3. When the meat has turned a dark char with nice grill-marks, sprinkle some black pepper and/or salt, and turn it over using a pair of tongs.

4. Once flipped over, sprinkle some black pepper and/or salt on this side. Leave it on the grill depending on thickness and preference.

5. Remove the steak onto a (preferably) warm plate and let it rest for 4 to 5 minutes. This allows the juices inside to redistribute.

6. Serve with garnishing and vegetables. (:


[get this widget]

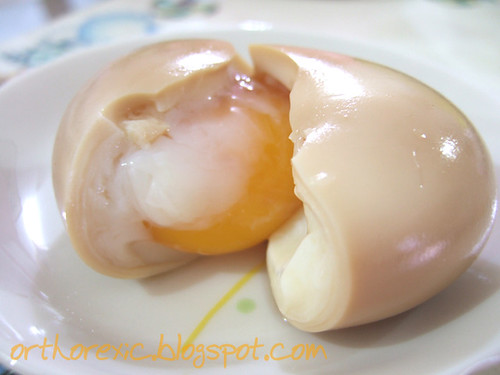
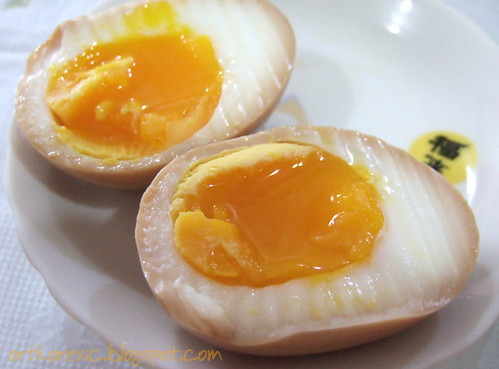
Following the previous unexpected surprise with my attempt at making Ni Tamago, I tried making the real, authentic one this time. Taking extra care at my timing, I finally did it! A successful, authentic Ni Tamago!


The recipe is similar to the previous, except I boiled the eggs for a minute longer (6 minutes). Also, I added mirin to the braising liquid, lending a hint of sweetness.

Click here for Chubby Hubby's recipe.

[get this widget]


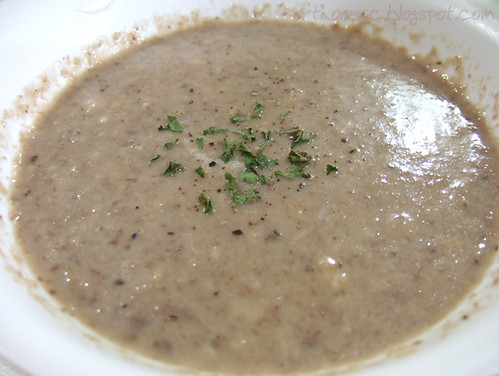
I love Cream of Mushroom Soup, especially those greyish kinds with bits of mushroom pieces in. The yellow-white/pale ones remind me of Campbell, lots of cream but very little mushrooms. This is my very own recipe for a low salt Cream of Mushroom Soup. I use lots of Shiitake mushrooms because they are very fragrant, and together with other mixed mushrooms, I call it "Shiitake and Friends"! I'm very proud of this because it was successful on the first attempt! (:


Ingredients:
1 packet (200g) Shiitake Mushrooms
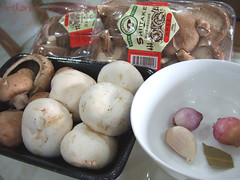
1 packet (250g) Mixed Mushrooms
1 clove Garlic, crushed
2 small Shallots, minced
1/2 or 1 Bayleaf
3 tbsp Full cream
1/2 cube Vegetable Stock
70g Butter
700ml to 800ml Water
Salt, Freshly Ground Black Pepper
A dash of Parsley (Optional)


1. Heat a pot on medium fire. Meanwhile, crush garlic, mince shallots and dice all the mushrooms into small pieces.

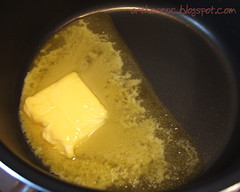
2. Melt the butter in the pot.

3. When all the butter has melted, add in the shallots and garlic.

4. Fry for about 3 minutes.


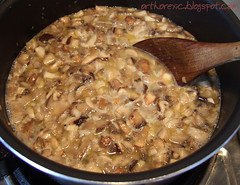
5. Now, add in the mushrooms. Keep stirring so that the mushrooms on top also get fried by the butter at the bottom. Make sure the mushrooms are well mixed, and fry for about 6 to 7 minutes. The mushrooms should be glazed and not dry and spongy.

6. Add the hot water and vegetable stock. Stir and boil for 5 minutes or until the stock cube has melted completely.

7. Add full cream and stir well until the soup becomes thick.


8. Lower the heat and simmer for 15 to 30 minutes. Meanwhile, stir regularly. If you see a layer of oil forming on top of the soup, scoop it out and discard.

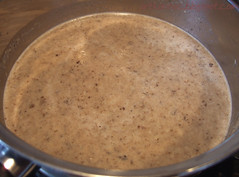
9. Blend the soup in a blender. If you like a chunky soup with bits of mushroom, separate the soup into two parts. Blend the first part until it becomes thick but not chunky. Then blend the second part to desired fineness. Do not blend too much if you like to chew on bits of mushroom in your soup.

10. Serve warm with a dash of parsley and/or freshly ground black pepper. Also goes well with toast, garlic bread or pasta. Bon Appetit! (:

Note: This is the low-salt version of the soup. You should add salt to taste just before serving or let guests help themselves with the salt-shaker.

You can make variations of the soup with different mushrooms. Porcini, Portobello, Button and Swiss Brown are all great mushrooms for this recipe. For a smoother, less chunky soup, you can either blend it more finely, add more cream or add less mushrooms.

[get this widget]
Ni Tamago is a special Stewed Japanese Egg where the egg white is firm, but the egg yolk inside is still slightly runny. It is usually an accompaniment to Japanese Ramen, and it takes quite a few hours to make. Here is Chubby Hubby's recipe to making Ni Tamago.


My Ni Tamago's yolk was far too raw compared to the authentic, but when I ate it really cold, it turned out extremely delicious like Onsen Tamago with a firm egg white. The yolk literally slides down your throat along with the tasty white. Extremely refreshing served really chilled.

Here's my Version
Ingredients:
3-4 (Chicken) Eggs

Soy Sauce Liquid:
2 parts Light Soy Sauce
1 part Oyster Sauce
1 tbsp Dark Soy Sauce
Water
[You can replace Oyster Sauce with mirin for a sweeter taste)

Method:
1. Bring some water to a light boil and add eggs from refrigerator directly in.
2. Make sure it's bubbling but not boiling too hard so that eggs do not bobble around.

Timing: (I like this best, it's just right!)
Medium Egg: [5.5 minutes]
Quail Egg: [3 minutes]


Timing: (For doneness pictured above)
Medium Egg: [5 minutes]
Large Egg: [6 minutes]


3. Remove from water and immerse eggs into a container full of icy-cold water for about 3-4 hours. Chubby Hubby uses an ice bath with vinegar though.
4. After that, dry the eggs and carefully (really carefully, you don't want to break the yolk) peel the shell.
5. Immerse the peeled eggs in the seasoning liquid for at least 3-5 hours, or overnight.
6. Serve really chilled!

Note: Be prepared to do this many times to get the timing/heat right! I failed many times before I got the results I wanted, so experiment and practise! Some may prefer a more well-done yolk, others might like it a little raw. Be patient and the result will be worth it!

[get this widget]


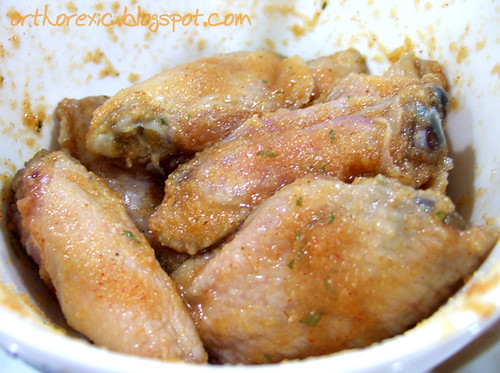
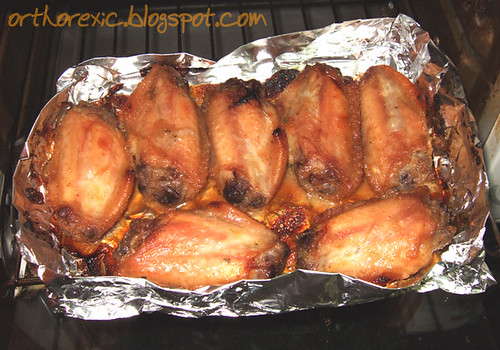
Something I experimented with a few days ago. It turned out a little stickier than I expected, and I used 1/2 teaspoon salt, so it wasn't tasty enough. I ended up using the toaster instead of the oven. But I thought it was a pretty good attempt. (: You can add some chilli pepper to make it spicy.

Ingredients:
6-8 chicken mid wings
Olive oil for coating

Marinade:
3 heaped tbsp honey
2 tbsp mexican chilli powder
3 tbsp garlic powder
2 1/2 tbsp onion powder
2 tbsp light soy sauce
1 tsp Worchestire sauce
Juice of 1/3 medium lemon
1 tbsp sugar
1 tsp salt
Some crushed parsley


1. Mix the ingredients of the marinade together in a bowl and put the chicken wings in.
2. Mix the marinade with the chicken wings well with hands, then leave it in refrigerator for at least two hours.


3. Pre heat the oven to 200 C. Bake the wings until they are cooked and turn golden brown.
4. Drizzle a little parsley on top and serve while hot!


Aunt also made some (lightly salted) fried potato wedges to go with the wings! Delicious! (:


[get this widget]


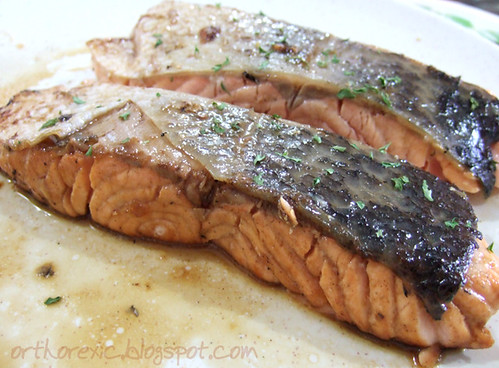
I was wowed by Camemberu's delicious photo of Nigella's Mirin-Glazed Salmon recipe, so I tried it out. And it turned out really well!

3 1/2 tbsp mirin
2 tbsp brown sugar
4 tbsp soy sauce
1 large salmon fillet
2 tbsp rice vinegar

1.Mix mirin, brown sugar and soy sauce in a dish and marinate salmon fillet. Meanwhile, set the frying pan on high heat.
2.Place the salmon on the pan for 2 minutes, turn over and add the marinade. Cook for another 1 minute.
3.Put the salmon onto the plate. Add the vinegar to the pan.
[I put the salmon back onto the pan again, flipping after 1/2 a minute. I removed the salmon onto the plate after a minute.]
4.Pour the glaze over the salmon and serve.

Note: I tweaked the recipe a little from the original.

Wondering what carbo I should cook to go with the salmon, I ended up making another batch of sauce and frying it with udon in some oil, and got... Mirin-Glazed Salmon Yaki-Udon!!

[get this widget]
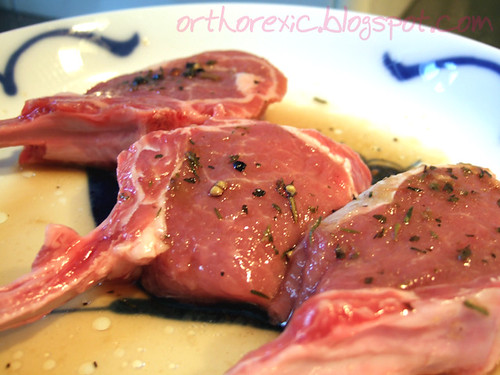
Ingredients
2 pcs French Cut Rack of Lamb

Marinade:
2 heaped tbsp Herbs of Provence (small individual packets available at MMMM! for 50c each)
1 tbsp Cooking Red Wine
1/4 cup minced onion
a pinch of black pepper
2 tbsp olive oil
dash of parsley/dried thyme/mint leaves
1/2 tsp salt [hb: do not add to marinade; sprinkle before serve]

Method

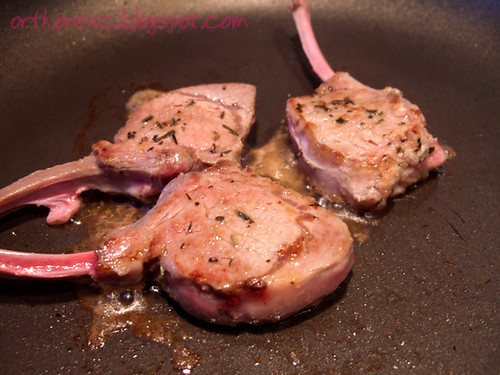
Pre heat the pan on high heat. Meanwhile, brush the Marinade all over the Rack of Lamb. if you have some time, make some extra marinade and leave the Rack of Lamb in the marinade for a while.


Put the Rack of Lamb on the pan when it's very hot. Leave it on one side for about 3 minutes or so, then turn over. For mine, I left it on the pan for about 3 and a half minutes on the other side. Touch the meat with a pair of tongs. It shouldn't be too squishy. For a first-timer like me, it's alright to undercook it because you can bring it back to the pan again. Take note of the timing so you can cook it to your preference next time.

Serve it hot on a plate. You might want to have some vegetables or garnishing. I'm not sure if you should leave it there for the juices to disperse (in the case of beef steak), so please do advise me on this. (: ...And there you have it--Bon Appetit!


*I go to Meidi-ya for their Rack of Lamb because it's not too fat and tender since the lamb is young (<1 year). They have pre-cuts or a whole rack at the counter for $9+/100g. The price is quite reasonable because they weigh it after they cut away all the fats.


[get this widget]
After watching the food series Buzzing Cashier, Mum decided to try out one of the chef's recipes: Breaded Pork Cutlet with Cheese... and here it is! It is similar to Cordon Bleu without the ham.

Oooh look at the hot melted cheese oozing out!

Biting into the crispy skin and tender meat reveals creamy melted cheese within! Quite a guilty pleasure indeed! :p


Method:
1. Pound, flatten and season pork meat
2. Sandwich a slice of processed cheese in between two pieces of meat (try to use cheese that's not immediately taken out from fridge so it will melt easily)
3. Cover the pork meat with egg yolk and breadcrumbs
4. Deep fry in hot oil and serve while hot and crispy


It was pretty good, except that it could do without Mrs. Dash spices and a little more cheese. (Mum used half a slice each, worrying about the sodium and phosphate content.) But overall, it was crispy and yummy for a first-try experiment!


[get this widget]
Mum braised some pork belly and we steamed some buns to create our own homemade 'Kong Bak' Bao. It was delicious, despite conscientiously reducing the salt and soy sauce!


Ingredients
Pork Belly

Dark Soy Sauce (just a little for colouring)
Sugar
Chinese Cooking Wine
A few cloves of Garlic
Light Soy Sauce
1 piece Star Anise ('Ba Jiao')

Water (just a little)
Salt to Taste (after simmer)

Method:
1. Blanch Pork Belly in hot water for a few seconds to remove blood and impurities. Remove and soak in cold water. Slice to desired thickness.

2.Put the sliced Pork Belly in a pot and add all the other ingredients. Do not add water. Simmer on low fire for at least an hour. Then add just half a cup of water and simmer another 2 hours. Refill every two hours. Repeat until fragrant and cooked to preferred doneness. Finally, add salt to taste.

3. Serve with steamed buns, lettuce, coriander and/or spring onion. Mum likes to go with red chillies and salted vegetable(soak in water first).

*sorry for no definite measurements, Mum does it "agar-agar"!

[get this widget]